6/28/2013

almost


it's taken me a little longer than anticipated to put this little number together, but that's because of my laid back attitude while working on this quilt top.  i'll piece ten minutes here.  ten minutes there.  i showed you the fabric pull a little while ago on facebook along with a snippet of the quilt top, which when posting i had no clue the colors were so off.  thank you mobile phone.  one day i will learn to check photos on the laptop before relying on my itty bitty phone screen to determine photo quality or color accuracy.  :)

also, supposedly GFC will be a goner in like two or three days.  i really don't remember when it's suppose to leave, but some people are going bonkers over it.  so maybe i should too?  anywho, follow along a different way if you like.  i'd love to have ya!

connect with me:

bloglovin'facebook, pinterest


have a great weekend!

Sharing: Lily's Quilts

peaceout

6/19/2013

Hexagon Clock || Fat Quarter Series


Today is my turn for the Fat Quarter Sewing Series.  Eek!

I really like it when I can combine home decor and sewing on my blog, and especially when it doesn't involve the expected like pillows, curtains, or bedding.

Hexagons, also known as honeycombs, are becoming more popular in home decor these days, but this classic shape has always been used by quilters.


Here are just a few great examples of hexagons being used in spaces.

Tiles
Sarah Richardson
Painting

Adventures of an Almost 40 Year Old Intern

Shelving
A Beautiful Mess
Wall treatment
Vintage Revivals

When Kari asked me to join this Fat Quarter series, I said heck yeah!  Or as my husband would say,"Is a frog's butt water tight?"  She challenged me to come up with a project using only ONE fat quarter.  (I made a scrappy clock too.)

Um, did I mention NO sewing is involved!  Hot diggity doggers for those us who hate y-seams!!  <--ME


I work very hard on producing original, creative projects.  This is for personal use only.  Please link back and give proper credit to owen's olivia if sharing your project on the web or through any social media site.  Thank you.

CLICK HERE FOR THE TUTORIAL.


There is a good line up of bloggers who are participating, so make sure you check in at U Create every day to see what has been whipped up using  fat quarters!

Here is the list of participants.

6/17 - Jill @ Create.Craft.Love

6/18 - Liz & Elizabeth @ Simple Simon & Co
          Christie @ Lemon Squeezy Home

6/19 - Nancy @ owen's olivia
          Mandy @ Sugar Bee Crafts

6/20 - Delia @ Delia Creates
          Kimbo @ A Girl and a Glue Gun

6/21 - Melissa @ Polka Dot Chair
          Autie @ iCandy Handmade

6/22 - Kelly @ Sewing in No Man's Land
          Megan @ Brassy Apple

6/24 - Amy @ Diary of a Quilter
          Rachel @ Family Ever After

6/25 - Bev @ Flamingo Toes
          Sarah @ Craft Snob

6/26 - Abby @ Sew Much Ado
          Sachiko @ Tea Rose Home

6/27 - Amber @ Crazy Little Projects
          Ashley @ Mommy by Day Crafter by Night

6/28 - Angelina @ JoJo and Eloise
          Jessica @ Craftiness is not Optional

6/29 - Crystal @ A Pumpkin and a Princess
          Jessica @ The Sewing Rabbit


Also, I participated in another fun blog hop, Let's Get Acquainted! hosted by the fabulous Beth at Plum and June.  I have met some really great new bloggers through this hop, so if you are looking to get inspired by some yet to be discovered sewing blogs, check them out!


Friday, June 7th
Amy @ 13 Spools
Casey @ The Studiolo 
Nanette @ Yeah, I Made That

Friday, June 14
Julie @ Jolie Maxtin
Melissa @ Melia Mae Quilting
Adrianne @ On The Windy Side
Molli @ Molli Sparkles
Laura @ Little And Lots
Valerie @ Between Quilts

Friday, June 21
Leigh Anne @ Ella's Cottage
Sarah @ Quilt Candy
Jackie @ NW Patchwork
Erica @ Happy Fabric
Stephanie @ Simple Sewendipity
Lauren @ Seraphym

Friday, June 28
Green @ So Sew Green
Gwendellyn @ The Rainbow Revolts
Jessica @ Stitched In Thyme
Kathy @ Kayak Quilting
Michelle @ Factotum Of Arts
Kris @ Sew Sunshine
Camilla @ Faffling

Friday, July 5
Christa @ Christa Quilts!
Stephanie @ Quarter Incher
Kristy & Shayla @ Sassafras Lane Designs

Fridau, July 12
Anne @ PlayCrafts
Cath @ Wombat Quilts

Friday, July 19
Alison @ Making Happyness
Sarah @ Sowing Stitches
Ella and Nesta @ Ella & Nesta's Little Room
Nicole @ Modern Handcraft
Aylin @ AyliN-Nilya

Friday, July 26
RobinSue @ RobinSue Quilts
Elisa Lea @ Lovelea Designs
Elizabeth @ In The Boondocks
Emily @ Sew E.T.


peaceout

6/12/2013

modern mini quilt challenge


You may have seen this quilt a few weeks ago when I blogged about it here.  There are more photos there too.


I'm participating in Ellison Lane's Modern Mini Challenge.   There's still time to enter yours!


peaceout

6/10/2013

Wood Paneling || Tutorial


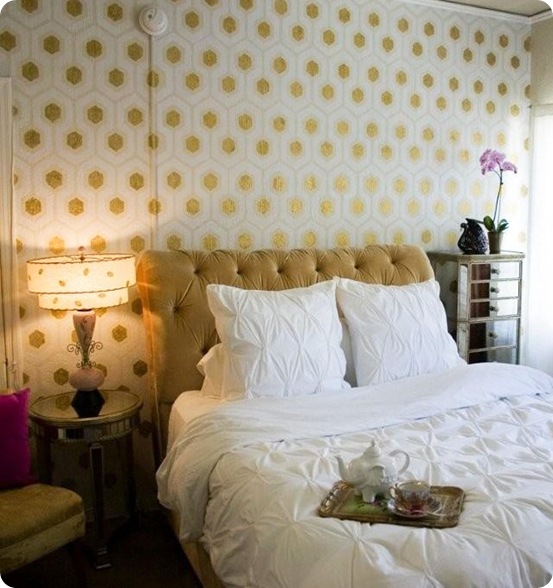
When this room reveal went live, I had many requests to know how I did the wall behind the bed.  My inspiration came from my own wood wall and Vintage Revival's.

This tutorial is not loaded with pictures (and phone photos on top of that)  because I was working hard and fast to get this room done for a contest, but it's pretty self-explanatory.  If you have questions, just send me an email.

Please read through all of the instructions before starting.

Materials:

- 4 x 8 sheets of 1/8" tempered hardwood (Masonite) cut down to 4 x 4.  Cut each panel into 3" widths.  The number of sheets you will need will depend on the square footage of the space you are covering.
- Miter saw (I used this in a bathroom next to the bedroom I was working on to make my job easier.)
- Planing saw
- Tape measurer
- Pencil
- 220 Sanding Block (or any other fine sanding block will do)
-  3/4" Brad nails and screws*
- Nail gun (I used this for the brad nails)
- Power drill*
- Paint ( I used Benjamin Moore's Decorator's White - my go-to, all time favorite white to use.)
- Paint supplies
- Ladder


Sand:

Sand all four sides of a wood panel piece.  We will be using the smooth side of the board to face the room.


Paint: 


Using a small brush, paint all four edges of the wood panel.  You do not need to use a lot of paint for this.  In fact, I was not anal about getting it perfectly white.  Some parts exposed a little bit of brown while other parts were completely covered.


Concerning the edges of the boards, you will only paint one board at time!  Sand, paint one piece, nail it up, repeat.  Once you do a few of these, you can then paint several boards at time.  See photo above. But do what is easiest for you.


Placement:


I started at the top of the wall, since I knew I would need to cut my boards in half once I reached the base board.  Pick a side to start on.  Place one board (3" x 48"),  smooth side up, on the wall so it aligns with the ceiling. Hold into place with brad nails.  I nailed one on each side and the center.  If using screws, screw them into either side, and if needed, one in the middle too.

*For this room makeover, the homeowners wanted to have as little holes as possible, so we did not use screws too.  Screws will produce a larger hole in the wall compared to brad nails.  Brad nails will secure the wood to the wall, but the wood panels can be removed with your hands. 

For my second piece, I repeated the above and then placed the board about a 1/8" - 1/4" away from the next piece.  I did not measure for exactness, so all my pieces vary.  When you get to your third or fourth piece, you will need to measure and cut to fit.


When you start on the second row, I placed my first board on the opposite side I started with.  I alternated it back and forth, so my lines would vary.  Sometimes, I would use leftover pieces and start with that first to add variety.


Repeat all these processes until your wall is complete.  If you have an outlet to work around, you will need to measure and cut around it.


To view this room makeover, please click here.
To view the source list, please click here.
Related:
Sharpie Wall

xx nancy

My quilting book released Sept. 24, 2015 and is on Amazon.  Check it out!


6/07/2013

Let's Get Acquainted! Blog Hop


I need a source.  Do you know who made this?


Hello!  The Simplicity ladies and I are excited to have you here today!  Welcome to the first day of the Let's Get Acquainted! Blog Hop tour.  I am Nancy.  With an abundance of sewing blogs out there, it is sometimes difficult for your work to be found and shared.  This blog hop is a great way to meet new people that you may not have otherwise discovered.   Thanks for having me on board Beth!


Blogged

I have written several about me intros in the past, which can be redundant for my regular readers.  Since this is a get-to-know-you blog hop with LOTS of newcomers, I have linked to a few posts that tell you more about me.  Those can be read here, here, and here.  If you want to know a little more about how I chose the name for my blog, you can read that over at Cindy's fabulous blog - Live a Colorful Life.

But here's the quick rundown.  :)

6/05/2013

Copyright © owen's olivia. All Rights Reserved.
Blogger Template by The October Studio